When extending a circuit or adding a new outlet, joining electrical wires—known as splicing—is a routine task that can save time and reduce wall damage. However, doing it incorrectly can create serious hazards. This guide outlines the proper technique, materials, and safety measures required to splice 120-volt circuit wires, as recommended by the National Electrical Code (NEC).
Wire splicing becomes necessary in various home improvement projects, such as relocating an outlet or light fixture, removing a wall, finishing a basement, or branching a circuit to serve multiple directions. While running a continuous cable from the service panel is always preferable, splicing offers a practical solution when that isn't feasible. The process typically takes 5 to 15 minutes and costs between $5 and $10, making it an accessible DIY task for those with intermediate electrical skills.
Essential Materials and Tools
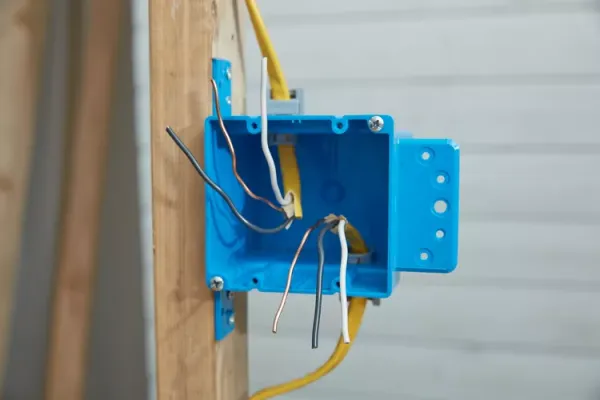
To perform a splice, you'll need a junction box (metal or plastic), cable clamps, UL-approved wire connectors (either twist-on wire nuts or push-fit types), a grounding pigtail wire (for metal boxes), and screws to mount the box. Tools include a cable ripper, wire stripper, hammer, screwdriver, pliers, and a cordless drill with a driver bit.
Choosing the right junction box is critical. Metal boxes offer durability but must be grounded with a pigtail wire connected to the circuit's ground wires and secured to the box with a green grounding screw. Plastic boxes are lighter, easier to work with, and do not require grounding, making them a popular choice for DIYers. Regardless of material, the box must be accessible after installation—it cannot be hidden behind drywall or other permanent coverings.
Safety First: Power Off and Proper Containment
Before any work, turn off power to the circuit at the service panel (breaker box). This is non-negotiable. Also, never splice wires without enclosing them in an approved junction or fixture box. Exposed splices in walls or ceilings are against code and pose a fire risk. The box protects connections from damage and contains any sparks or heat in case of a fault.
Another critical rule: avoid using electrical tape alone to join wires. Tape does not provide a secure mechanical bond and is not an approved splicing method. While tape may be used to reinforce wire nuts, it should never be the sole connector.
Step-by-Step Splicing Procedure
Start by confirming that the cables you are joining are compatible—same wire gauge and number of conductors. For example, a cable labeled "12/2 w ground" contains two 12-gauge insulated wires plus a bare copper ground. Use a cable ripper to strip about 6 inches of the outer sheathing, being careful not to nick the inner wires. A utility knife is risky and can damage insulation.
Next, strip about 1/2 inch of insulation from each conductor using a wire stripper with the correct slot for your wire gauge. Inspect all wires for damage, such as cuts, burns, or nicks, and replace any compromised sections.
Prepare the junction box by removing two opposing knockouts with a screwdriver and pliers. Attach cable clamps to these openings—plastic clamps snap in, while metal clamps require threading a ring from inside. Insert one cable through each clamp, ensuring the sheathing extends 1/4 to 1/2 inch into the box, and tighten the clamps securely.
Mount the box to a framing member, positioning it so its front edge will be flush with the finished wall surface (e.g., extend 1/2 inch beyond the stud if using 1/2-inch drywall). Then, make the wire connections: join wires of matching colors using approved connectors. For wire nuts, you may twist wires together first or simply screw the nut over parallel wires; ensure no bare wire is exposed and that the connection is tight. Push-fit connectors are an alternative—just push the stripped wire into the socket.
Finally, connect the grounding wires together. For metal boxes, add a pigtail to the ground bundle and attach it to the box with a green screw. After finishing the wall, secure the cover plate.
When to Call a Professional
While splicing is a manageable DIY task, it's wise to hire a licensed electrician if you lack experience or confidence, or if the wires have been spliced multiple times before. There is no set limit on the number of splices, but many experts suggest avoiding more than three on a single wire. If in doubt, professional help is the safest option.
By following these guidelines and adhering to NEC standards, you can safely extend and modify your home's electrical system, ensuring both functionality and peace of mind.
Comments 0